QR code size: how big should it be on a table?
A widely used rule of thumb: the distance a QR code is scanned from is about 10 times the width of the code. Put the other way round, the code should be at least a tenth of that distance across. It is not a standard, just a starting point: testing with real phones has the final say.
| If it is scanned from… | Minimum code width | Where that happens |
|---|---|---|
| 20 to 30 cm | 2 to 3 cm | Sticker on the table, card in the hand, delivery packaging |
| 40 to 50 cm | 4 to 5 cm | Table tent or QR code stand in the middle of the table |
| 60 cm to 1 m | 6 to 10 cm | Counter, till point or bar |
| 1 to 2 m | 10 to 20 cm | Window or door, seen from the pavement |
| 3 m | 30 cm | Wall sign or chalkboard |
On a table, 3 cm across is a sensible minimum if the stand is within reach; in the middle of a table for four, the furthest phone can be half a metre away, so aim for 4 or 5 cm. Measure the code itself, not the white margin or the frame.
The length of the address matters too: a code that stores a long address has more squares, so at the same size each one is smaller and harder to read. A short address is better.
White margin, contrast and shape
A code of the right size can still fail. These rules are worth keeping:
- Quiet zone: the QR code standard (ISO/IEC 18004) calls for a clear margin of 4 modules around the code; a module is each little square. Keep text, borders and the edge of the card away from it.
- Dark on light: the code goes dark on a light background, with strong contrast. Black on white is the safest.
- No inverted colours: a light code on a dark background looks smart, but some readers do not recognise it.
- No pale colours: a gold, light grey or pastel code loses contrast. Colour belongs in the frame or the card background, not in the code.
- No stretching: stretch the code to fit and the modules stop being square. Always resize in proportion.
- Careful with a logo on top: a logo in the centre covers part of the code; it only scans with high error correction, and even then needs testing.
If you download the code on its own from ElMenu (PNG or SVG) for your own design, the margin is up to you: the SVG is cropped to the edge of the code and the PNG has only a narrow white border. The print templates already place it inside a white panel.
Matt or gloss: the glare problem
Gloss lamination and polished acrylic reflect light. With a pendant lamp right above the table, the camera sees a white patch where the squares should be and cannot read the code. Matt paper and matt lamination cut that problem down a lot.
If you already have glossy stands, test them under your real lighting and from several angles; sometimes tilting them or swapping in a matt insert is enough.
Where to put the QR code
- On every table: that is where it gets used. Make sure every seat can see it; a table tent works because it reads from both sides.
- At the entrance or in the window: so passers-by can see the menu before coming in. Bigger, and at eye level.
- At the counter, till or bar: for takeaway orders, people waiting and guests at the bar.
- On takeaway and delivery packaging: a sticker keeps the menu to hand for the next order.
- Not in the toilets: nobody wants to choose their dinner there.
Also avoid spots where plates, the napkin holder or condiments hide it, and the bare tabletop unless the code is protected: daily cleaning soaks and scratches it.
QR code stands: acrylic, laminated card, sticker or table tent
| Material | For | Against |
|---|---|---|
| Acrylic QR code stand | Durable, wipes clean and looks tidy | Glossy ones reflect light; choose one with a replaceable insert |
| Laminated card | Cheap, you print it yourself and it survives cleaning | Go for matt lamination; corners curl with use |
| Sticker on the table | Cannot fall over or go missing | Scratched by plates and cleaning; needs tough vinyl or laminate and is hard to replace |
| Card table tent | The cheapest; replaced in minutes | Stains and bends; fine for starting out or for events |
You do not need a print shop to start: an ordinary printer, thick card and a laminator make a decent table tent (some venues call it a table talker). If you order acrylic stands, make sure the insert can be swapped.
Standard table talker sizes in the UK
| Size | Dimensions | Good for |
|---|---|---|
| DL | 99 × 210 mm | A tall, narrow card: the code plus a short drinks or specials list |
| A6 | 105 × 148 mm | A small stand with the code and one line of text |
| A5 | 148 × 210 mm | The code, the menu address and your Wi-Fi details |
What to write next to the QR code
- A short instruction: ‘Scan to see the menu’. Nothing more is needed.
- The short menu address, for anyone who cannot or would rather not scan: something like elmenu.uk/your-venue takes seconds to type.
- The Wi-Fi on the same card: network name and password, so the menu opens even where mobile signal is poor indoors.
- Nothing distracting: no paragraphs, no list of social handles and no other codes alongside. One QR code per stand, so nobody scans the wrong one.
How to test it before printing for every table
- Print a single table tent at the final size, on the final paper.
- Test it with three different phones: an Android, an iPhone and an older model, which usually has a weaker camera.
- Use the phone’s own camera, no special app: that is what guests will do.
- Scan from the seat without leaning over, then again in low light, as at dinner service.
- Check that the menu opens on mobile data, not just on your Wi-Fi.
- If any phone struggles, make the code bigger, raise the contrast or switch to matt. Only then print the rest.
ElMenu’s 8 QR code templates
If you use ElMenu, the QR Codes section of the dashboard has eight templates to download as PDFs and print, with your code already on them:
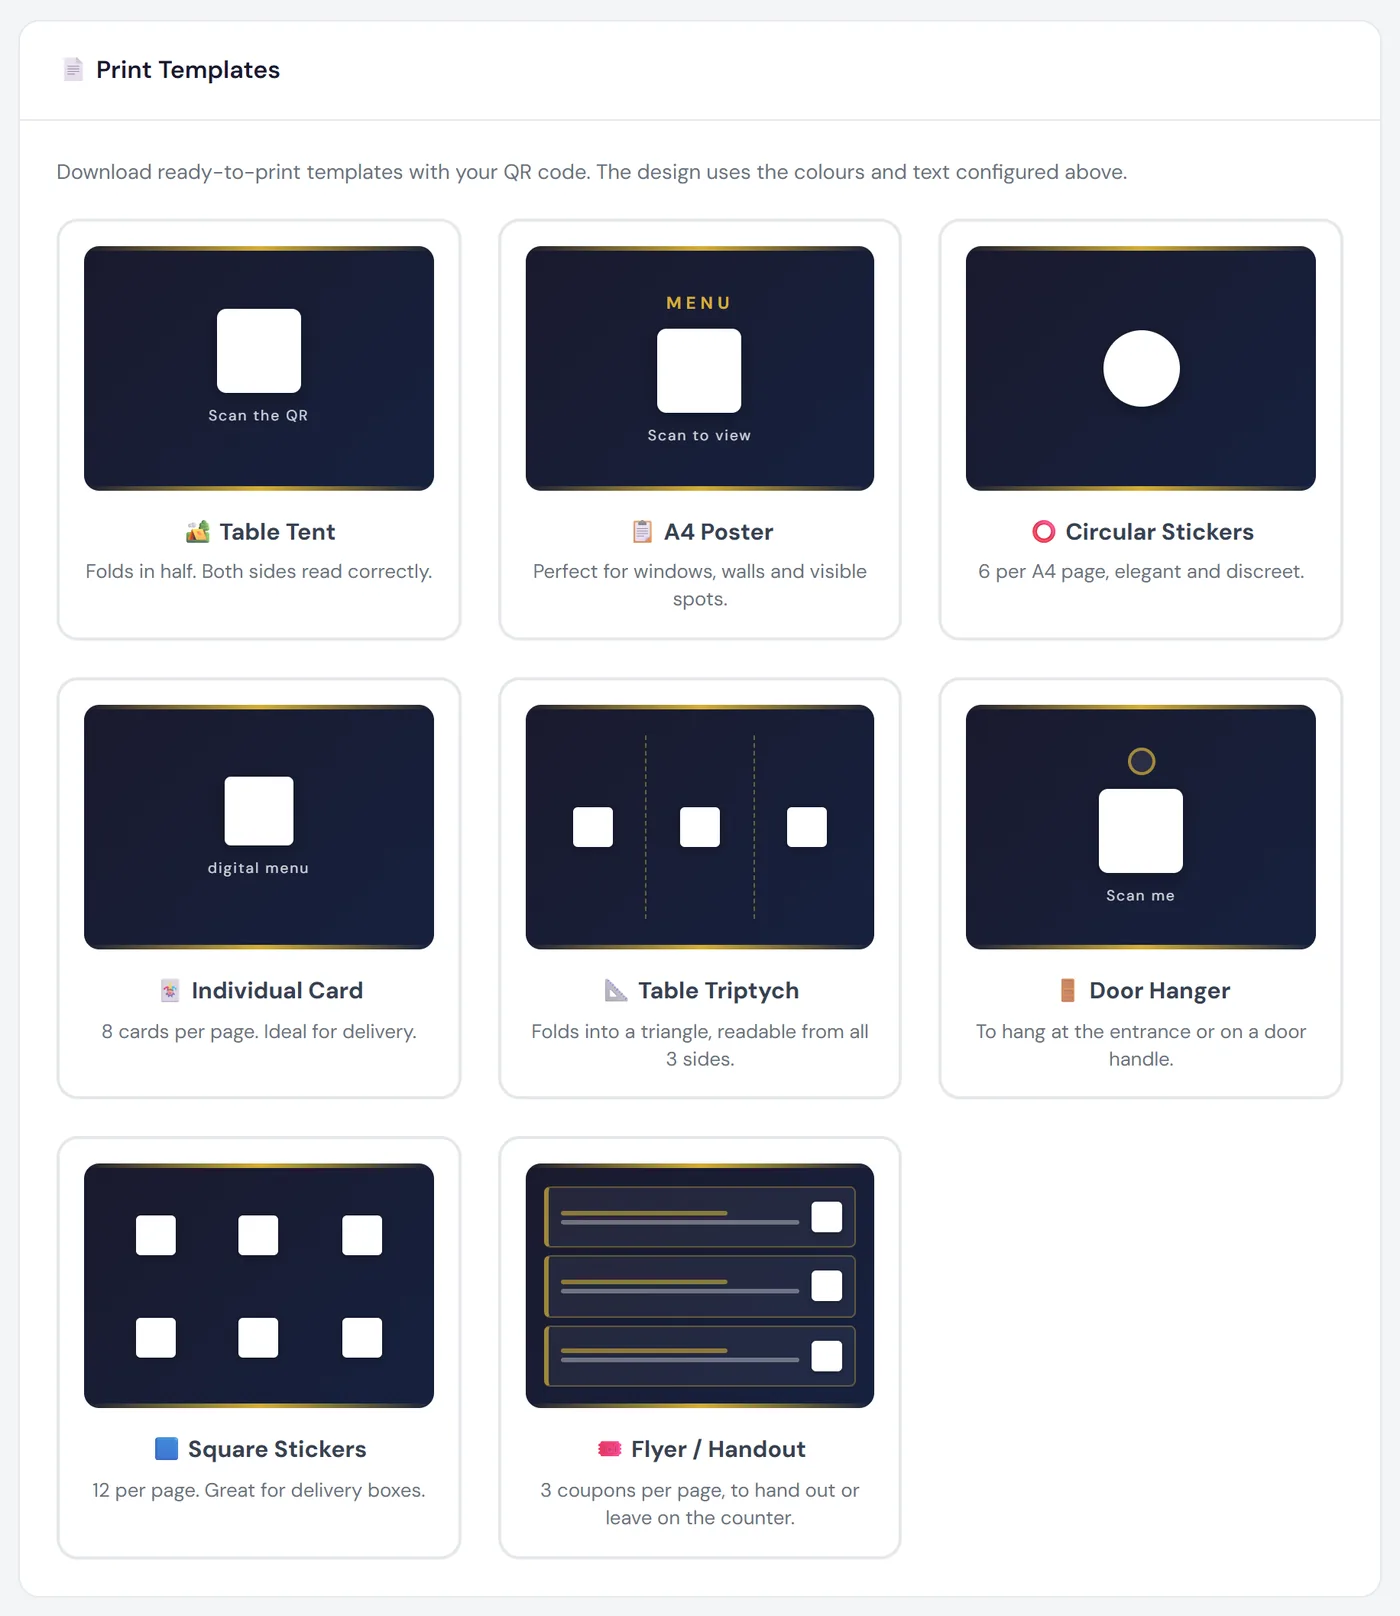
| Template | What it is for | Printed code (approx.) |
|---|---|---|
| Table Tent | One sheet folded in half; reads from both sides | 4.5 cm |
| A4 Poster | Window, wall or entrance | 10 cm |
| Circular Stickers | 6 per A4 sheet, 6 cm across | 2 cm |
| Individual Card | 8 per sheet, business-card size | 3 cm |
| Table Triptych | A three-sided table talker: folds into a triangle and reads from all 3 sides | 5 cm |
| Door Hanger | For the entrance or a door handle | 5.5 cm |
| Square Stickers | 12 per sheet; for delivery boxes | 3 cm |
| Flyer / Handout | 3 per sheet, to hand out or leave on the counter | 5.5 cm |
All of them can show the menu address under the code. The Table Tent can also carry your logo, and the Table Tent, A4 Poster and Door Hanger the Wi-Fi network and password. You choose the background, accent and text colours, or a preset style; the code itself always prints black on white, with the highest level of error correction.
On the Professional and Premium plans you can also create several tracked QR codes, say one for the terrace and one for the bar, and see how many scans each gets. They all lead to the same menu.
If you have not yet decided how to publish your menu, see the options for a free QR code menu and, if it is already a PDF, the PDF menu with a QR code. The whole journey, from menu to table, is in how ElMenu works. And if all you need is the code for an address you already have, the free QR code generator makes one with no account.